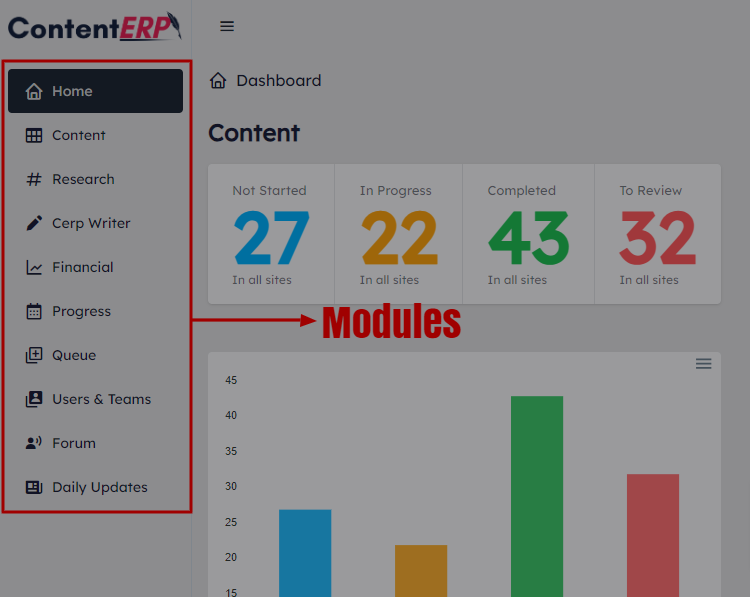
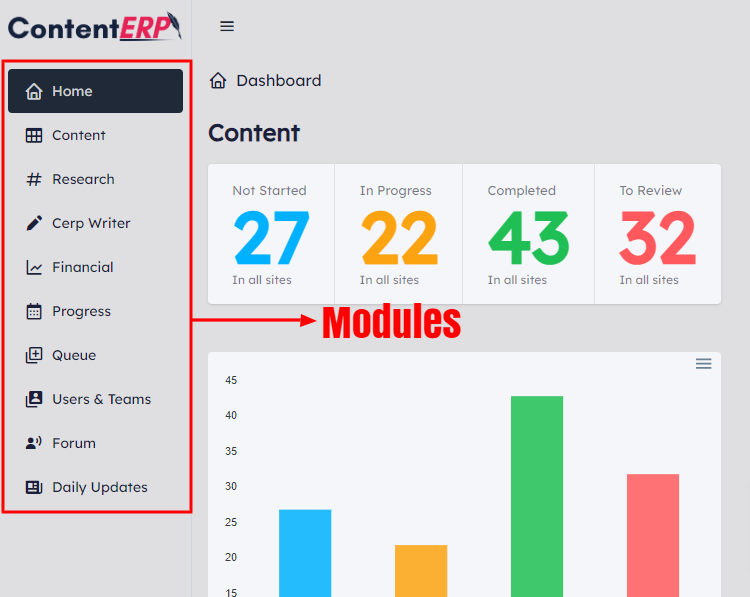
What better way to navigate swiftly between tabs and pages on a website than an intuitive module? The modules are the overall organization and arrangement of our menus and tools, allowing you to create and manage your content and team efficiently. Our modules tab is interactive and user-oriented and allows you to switch between pages by simply pressing the assigned number on your computer keyboard.
Currently, there are 10 modules, assigned numbers 1-0.
Shortcut Tips: The figure in parentheses “()” after each module is the shortcut. Press the figure on your keyboard to see the magic.
Home Module (1)
The home module represents the ContentERP dashboard that is displayed on login. This module contains a list of other modules, task overview, content report, and overall progress report of your content.
On this module, you can also access and manage your profile information, get notifications, create to-do list, and do so much more.
Content Module (2)
The content module contains the list of contents created on your account and organizes them according to the sites. You can also create, edit, and manage both content and the site, as well as go as far as reorganizing the sites.
Here are some of the features of the page and their functionalities:
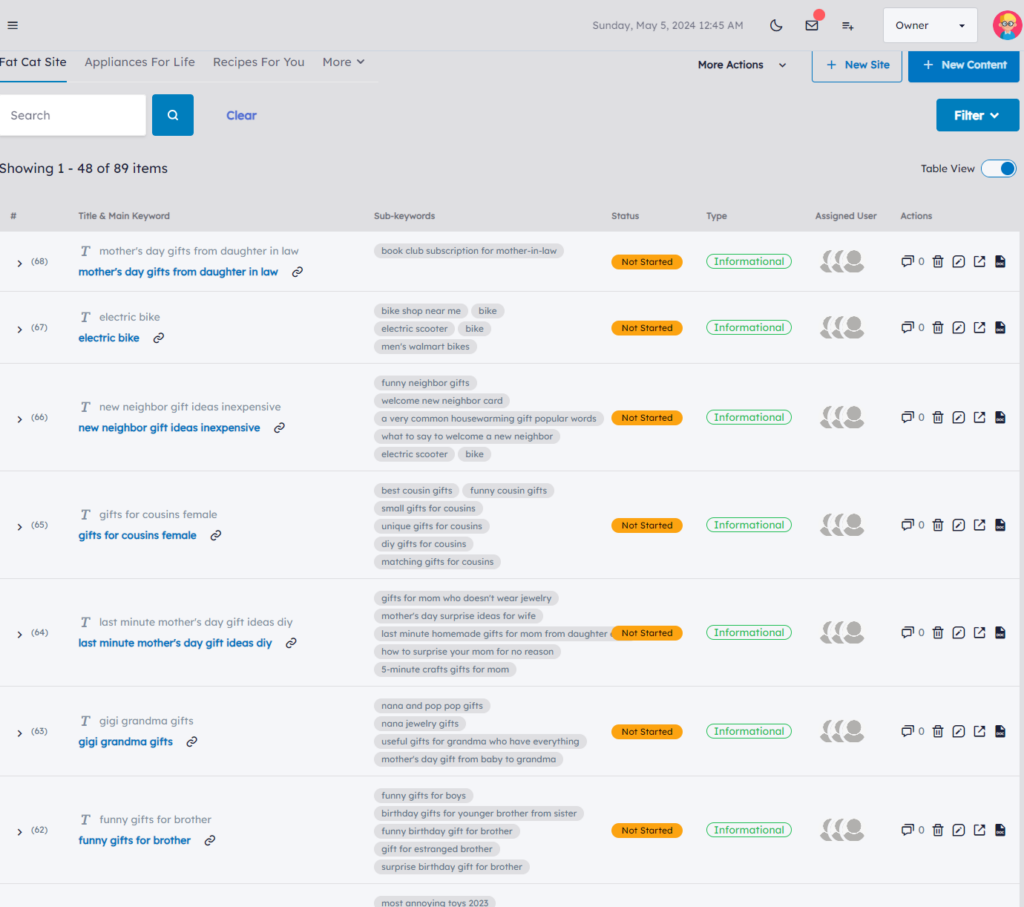
- New Site: This button allows you to create a new site.
- New Content (c): Use this button to create new content on any of the sites connected to your account.
- More Actions: Use the feature to select more actions on the content module, such as editing a site, re-ordering the sites, importing and exporting content, and deleting a site.
- More: If you have two or more sites connected to your account, you can use the “more” dropdown button to switch to hidden sites.
- Filter (f): Use this feature to filter your content. Currently, there are four (4) filter options: manager, status, type, and date.
- Search (s): Use the search bar to look up content. Type in the keyword or title of a topic and press the search icon, or press enter on your keyboard. Please note that you can only search for content on the selected site. You can switch between sites to search for different content.
- Clear (⌥ + c or alt + c): Use the clear button to reset or clear your search item.
- Table View (t): Use this feature to toggle between card view and table view.
Remember: The figures and letters in parentheses “()” after each feature is the shortcut. Press the figure or letter on your keyboard to see the magic.
Research Module (3)
On the research module page, you can carry out keyword research and analysis. Our system uses Google keyword tools and AI to make accurate suggestions based on the main keyword you provide and analyze the keywords. It also gives you suggestions on related keywords that can improve your on-page SEO.
This module allows our users to research and manage keywords for their articles. You can either select an article and carry out keyword research for the article or create a new article from the keywords you’re researching.
Our system also generates a list of top sites for a particular keyword, making competitive analysis a lot more easier as you can easily know which sites are ranked highest for a particular keyword.

Here are some of the features of this module that can help you improve your content creation journey:
- Keyword Research and Analysis: On this module, you can easily analyze and research the keywords you want to use in your articles. For efficiency, before commencing the keyword analysis or keyword research, we recommend you select a specific content you would like to work on.
- Keyword Suggestion: The keyword suggestion is a feature that suggests high-ranking keywords for you based on the current keywords you’re researching. Our keyword generator suggests similar keywords that can be used as alternatives or interchangeably with your keyword.
- Location-specific Keyword Research: This feature allows you to streamline your keyword research to a specific location, such as researching birthday gifts ideas in the US or France, or used vehicles for sale Australia. All you have to do is select the area you want your keyword research to be based on.
- Filter Our Unnecessary Keywords: With this feature, you can easily eliminate unnecessary results from your keyword suggestions. Use the filter feature to tailor your research to your specific need.
- Save Keyword For Later: You can also save keywords to be used later. The save for later feature can come in handy when you come across keywords that can be useful in future contents in your research process.
- Create New Content From Researched Keywords: Used the researched keywords to start a new content on your blog. ContentERP is designed to allow our users start a new content with a new keyword discovered during the keyword research process.
Cerp Writer Module (4)
Cerp Writer or Article Writer allows you to create, edit content, and modify content directly from our dashboard. ContentERP is designed with an intuitive and user-friendly interface and equipped with an AI writer that helps you generate every aspect of your article, from the outline to the body of the article.
The AI writer can do so much more than just generating your content, the article editor is also designed to simplify your writing process. CERP Writer is also equipped with AI image generator that helps your generate unique pictures and cover images for your article.
Cerp Writer Features
The Cerp Writer AI assistance is designed to help simplify your writing and here are the functions available with our AI assistance;
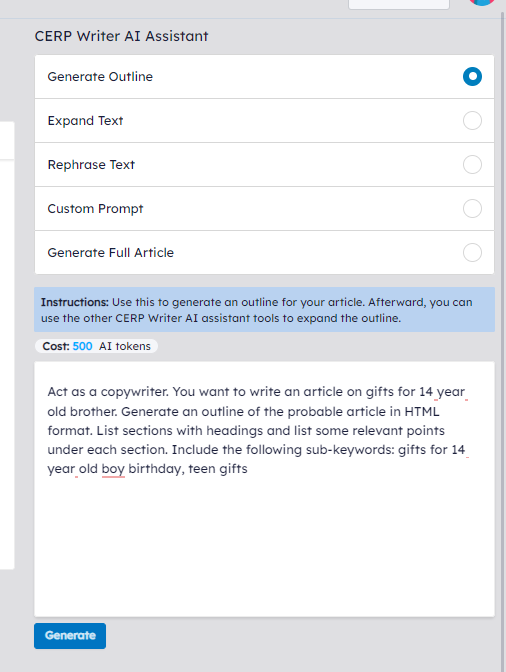
Generate Outline:
Generate an outline for your article with our AI assistance by imputing a command prompt that resonates with your objective. By default, we have a system-defined prompt that was created with your audience in mind. Additionally, the default prompt includes the keywords associated with the content you’re working on. But what’s more interesting? You can edit this prompt and customize it to your taste.
Expand Text:
Use the “expand text” feature to further expand your articles by converting short-form paragraphs and short sentences to long and meaningful paragraphs. Write a prompt for each of the outlines, generate the content and copy the result into the text editor for formatting and further editing.
Rephrase Text:
This feature can be used to rephrase a sentence or paragraph in the article using our AI assistance. This can be instrumental in changing the tone of your article and eradicating plagiarism.
Copy the sentence(s) or paragraph(s) you want to paraphrase and paste it into the prompt generator, include your command and click the “Generate” button. You can use one-word prompts like paraphrase, rewrite, rephrase, etc., or full-sentence prompts, depending on your preference.
Custom Prompt:
The custom prompt enables our users to generate additional task-specific prompts. You can generate a wide range of prompts and use the result in creating the content. This gives you the freedom and flexibility to explore different options and generate a range of content for your article.
Generate Full Article:
Use this feature to generate the full article from scratch. Our AI assistance can be used to generate the outline and the full body of the article. This makes your writing process simple, straightforward, and faster.
Additionally, unlike other features that require you to copy and paste the generated results, the generated full article automatically populates the editor, which you can further edit and format to your needs and taste. Don’t forget to save your article after generating, editing, and formatting.
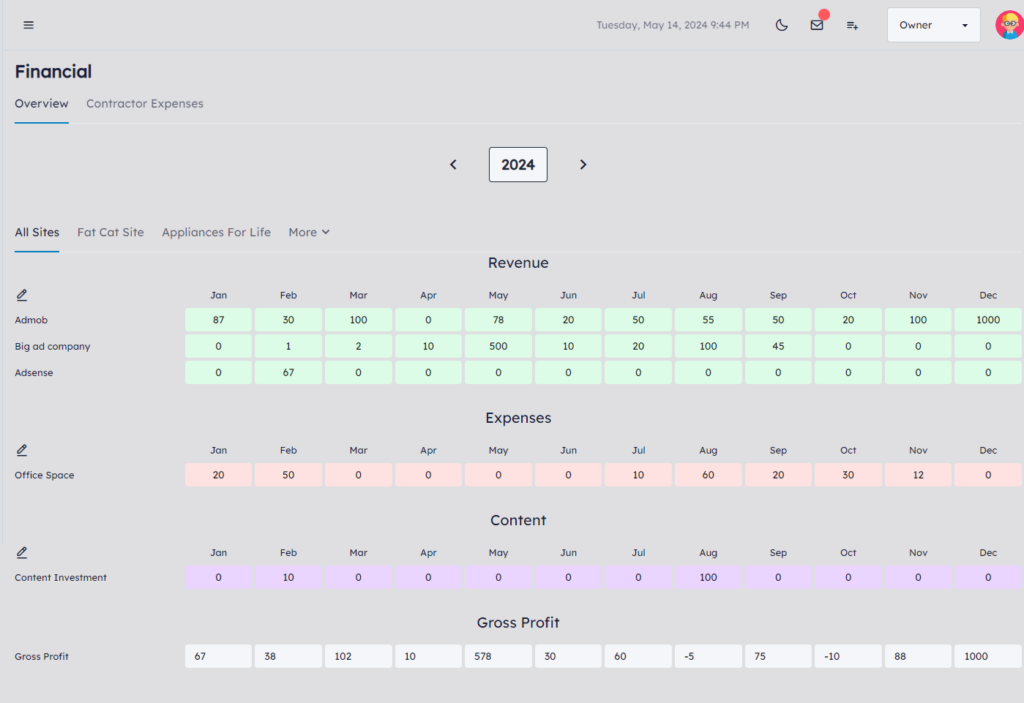
Financial Module (5)
The financial module allows our users keep track of their income and expenses over time. This report can be viewed according to each site, enabling our users keep track of the income generated across each site.
The users can also create new streams of incomes and expenditures, allowing them to truly take note of all their income streams and expenditure outlets.
Contractor expenses tab allows the users to keep track of their cost of outsourcing jobs to external contractors and clients. Monitor the cost of hiring each employees on the team and also take note of unpaid debts.
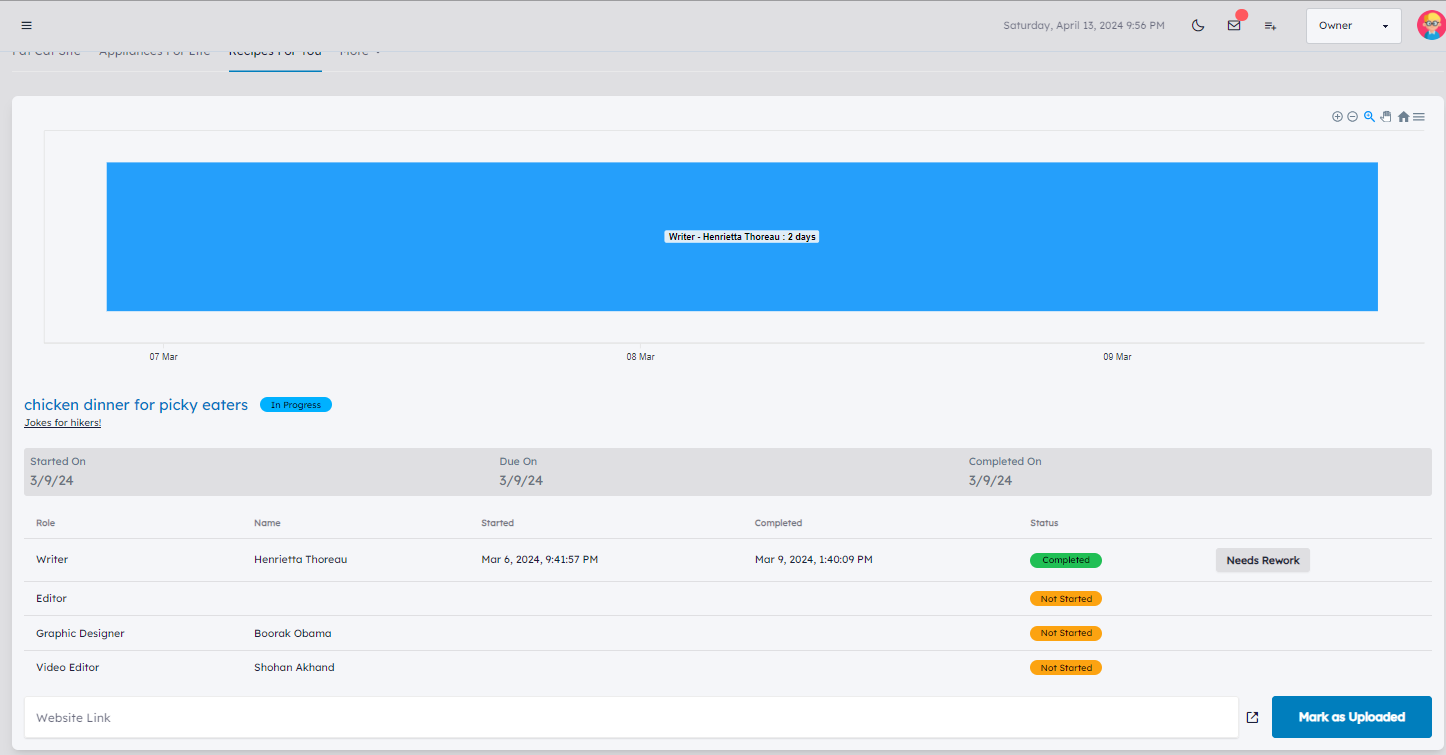
Progress Module (6)
The progress module displays a list of all contents that are still in development. The contents are categorized according to the sites and you can track which team members have yet to complete their task, which team member has completed theirs, request for rework or correction, and also mark the content as uploaded.
This module contains ONLY the contents that have been started. All completed contents or contents that haven’t been started are not listed on this page.
Queue Module (7)
The queue module displays the list of tasks assigned to each team member and the status of the tasks. The major difference between this module and the progress module is that this module contains tasks that haven’t been started and they are categorized according to required skills and the owner of each task.
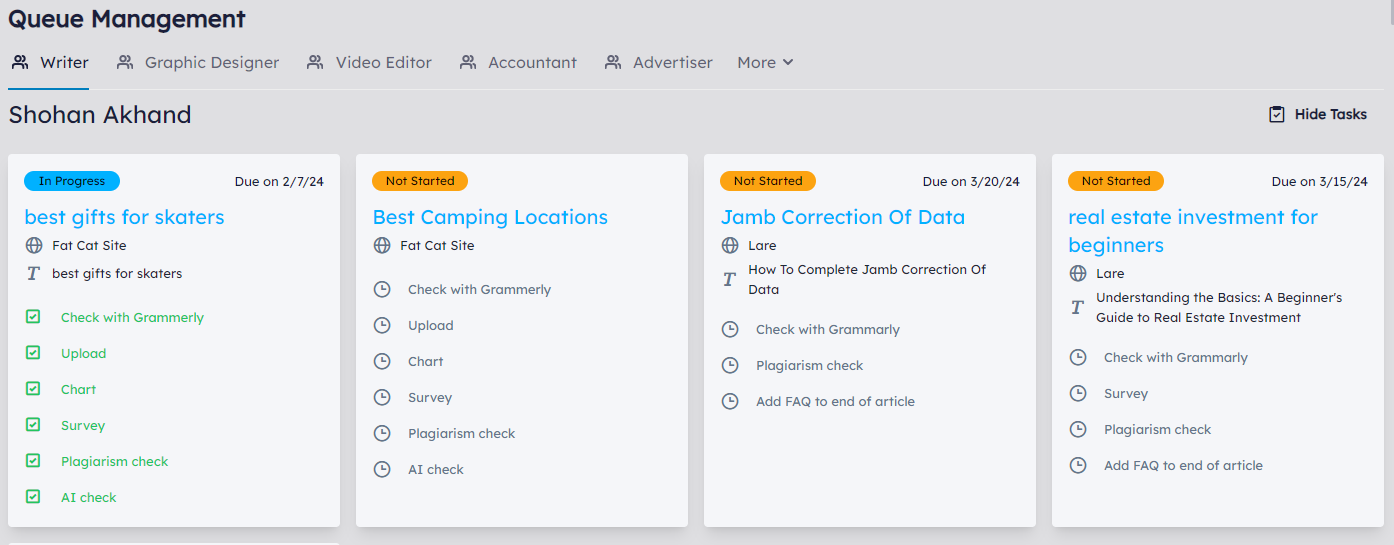
Select a skill category, for example, graphics designer, you will get a list of tasks assigned to each of the graphics designers on your team and the status of each task assigned to them, either in progress or completed.
Note that this module only displays contents that are not completed.
User and Team (8)
Manage your team members with the “User and Team” module. This section allows you to add, remove, or modify team member’s access.
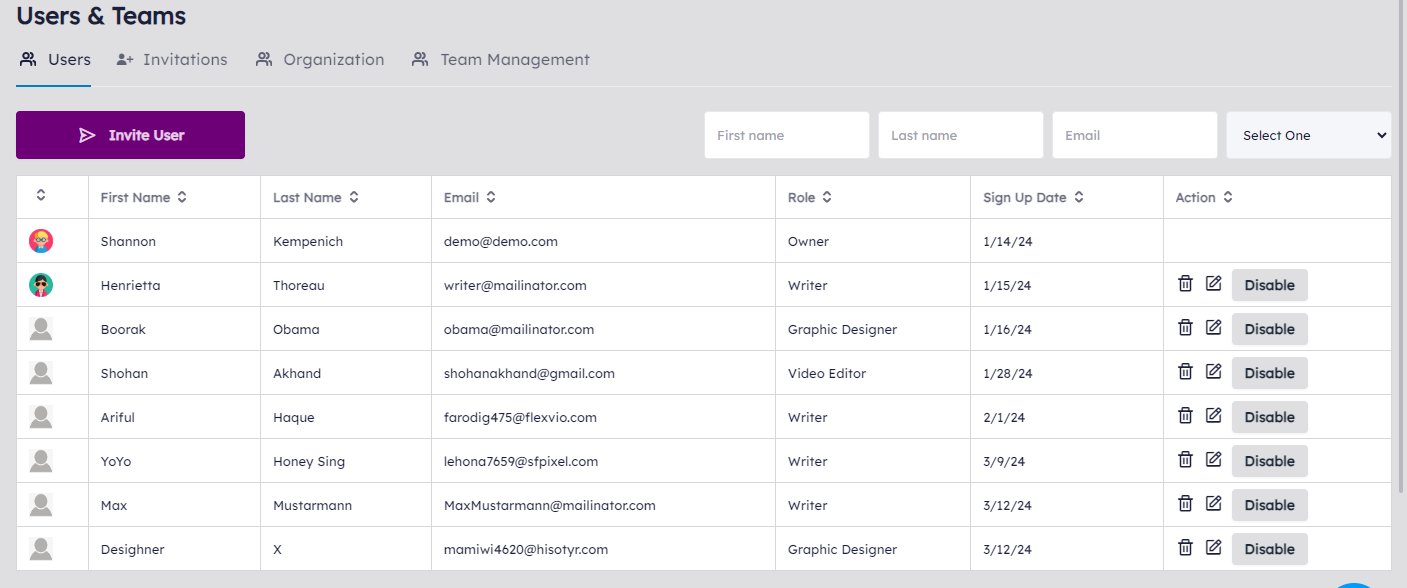
This module contains four (4) sections that allow you to properly manage your team and organizations. Here are the actions you can perform with each section:
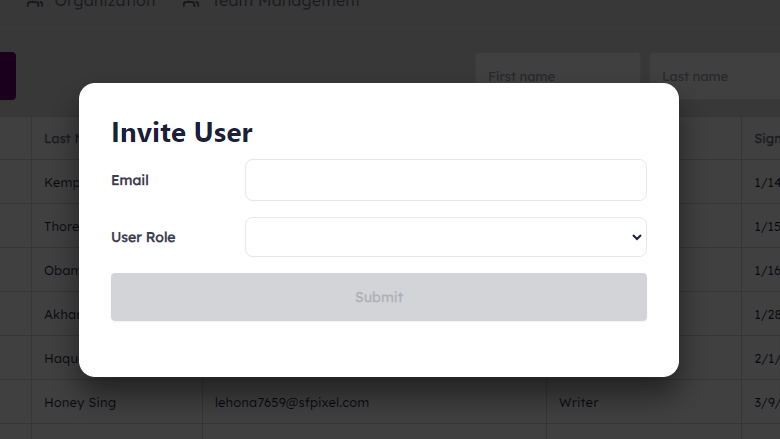
- User: This section allows you to invite users to your team and edit the team members’ access and details.
- Invitations: This is where you’ll find the list of all invited team members who have yet to join your team. You can choose to delete their invite from this page. This will invalidate the invite link sent to the user.
- Organization: This section displays all the team members of your organization and their roles, such as owners, co-owners, managers, and content creators. Meanwhile, you can’t perform any actions on this page. If you wish to add teammates or update team member’s roles, you can do that from the user section on this module.
- Team Management: This allows you to create and manage multiple teams on your account.
Modify User:
Use the form field after the “invite user” button to search for a team member. You can search for either first name, last name, email, or role.

On the user you intend to modify, select the appropriate action from the “action” tab. There are three (3) actions represented by icons and buttons;
- Dustbin Icon: For deleting a user from your team.
- Edit Icon: For editing user access and details. In this section, you can change a team member’s role, change permissions, and payment terms.
- Disable Button: Allows you to disable and enable team members without removing them from your team.
Forum (9)
The Forum allows you to interact and share knowledge of ContentERP with other users. You can ask questions in the forum, answer other people’s questions, comment on forum posts, or even start a new topic for discussion.
The Post section displays all forum posts, and you can interact with the posts by either upvoting, downvoting, or replying to the posts.
The Notifications section displays notifications received from the forum. Either someone interacts with your posts and comments, or a forum member mentions you in the post. All forms of forum-related notifications are displayed here.
Use the “Open Forum” button to go to the forum. Remember, you must log in before you can post or interact with other forum posts.